Sunday, October 16, 2011

Another Box Project

 Since my sister is also a big fan of Tim Holtz I wanted to make something special for her for her birthday. I decided to make her a box for distress stains and fill it with new distress stains. I will admit I might have made the lid a little tiny bit too big...but I didn't let that stop me from finishing it up.

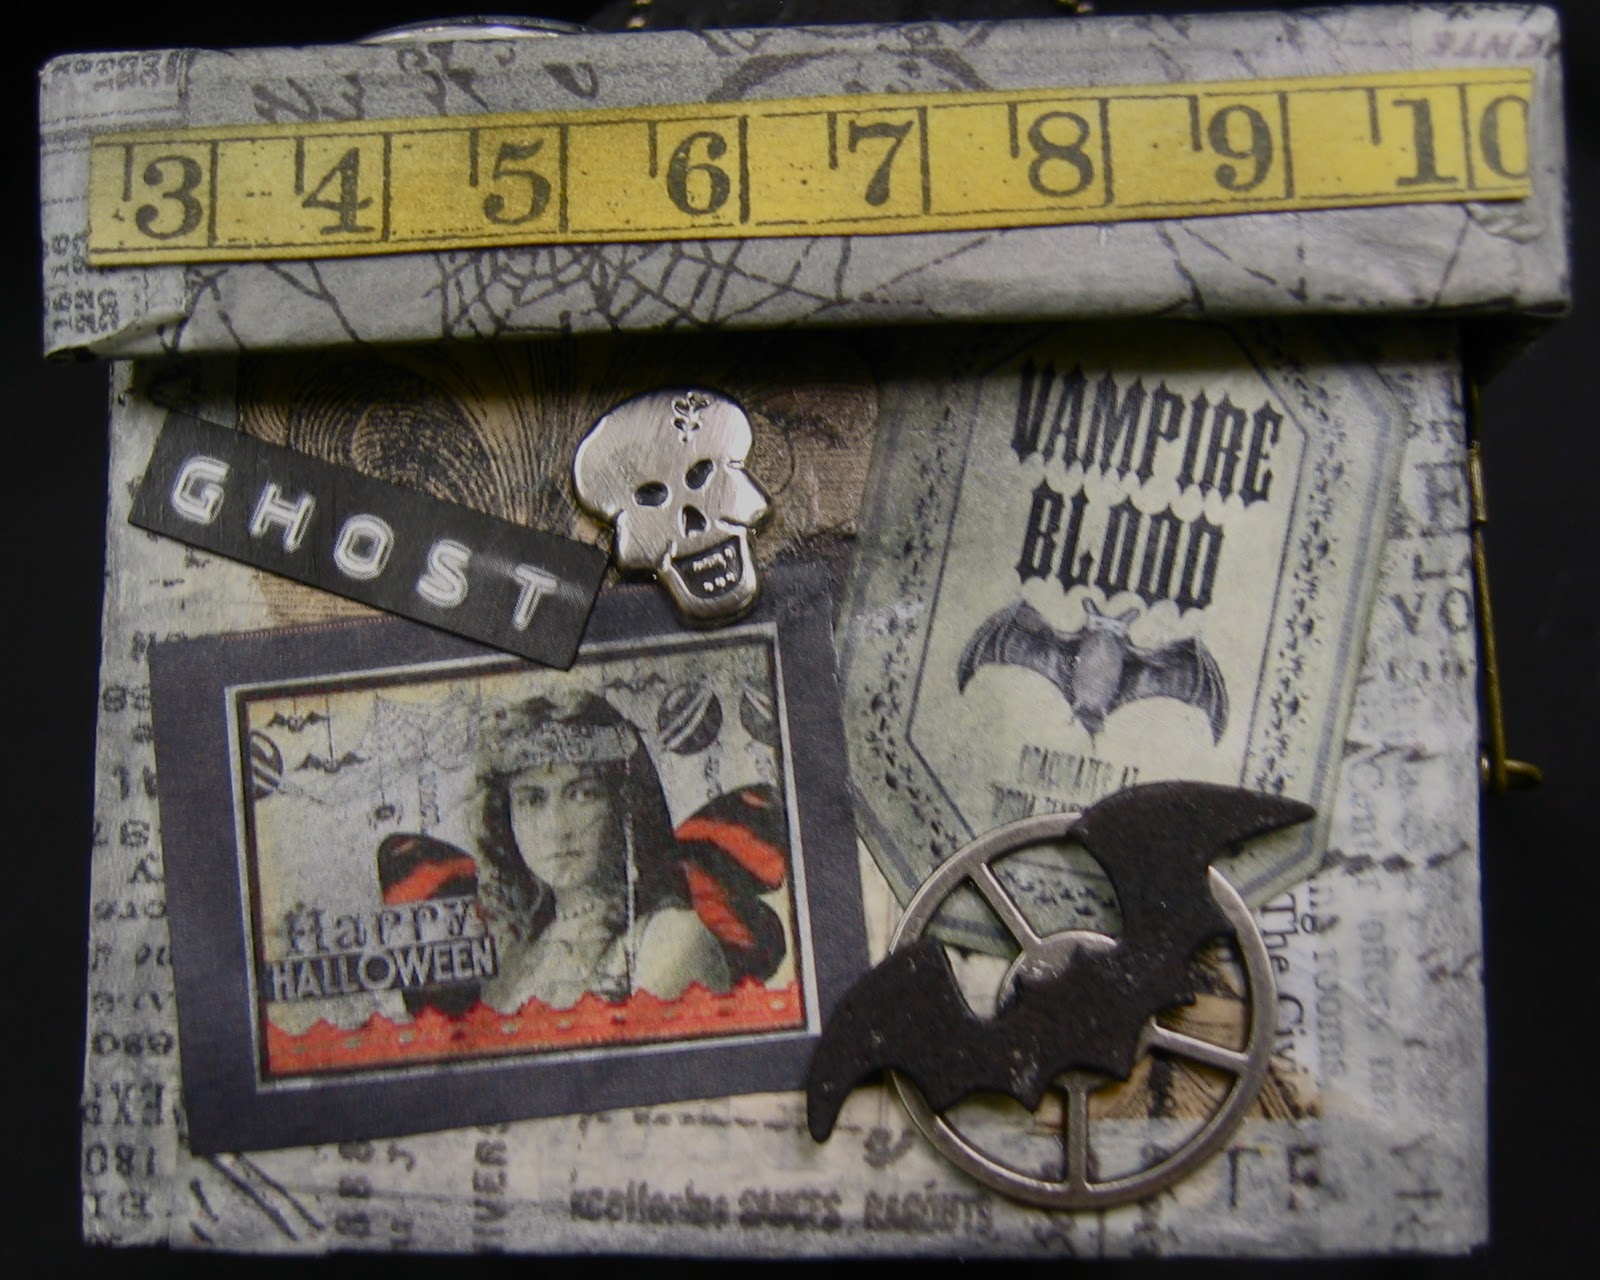
The first picture is of the front of the box telling what's in the box. The button things along the front of the lid are some old-fashioned upholstery tacks that I stained in Tim Holtz/Ranger colors. The box was made from mat board, assembled with masking tape and covered with papers and edges finished with tissue tape. I stamped, glued, distressed and whatever. Used little trinkets I've collected here and there. The next picture below is the top of box with a picture of my sister wearing a crown (I'll admit the picture was taken quite a while ago, maybe 40 years or so). The top has her initials and even a flower I crocheted in white and stained with distress stains. The next picture is the back which isn't too exciting but you might notice that around the edges of the back and sides I printed out names of the distress stains and added them as decoration. I even managed to squeeze in a peacock feather.

I will say it would not be possible to do something like this with so many different objects without the use of Claudine Hellmuth's Matte Medium. It can tame anything. Anyway, the box is now in my sister's art studio and she swears she'll be using her new box of stains really soon.


Saturday, September 17, 2011

Something Different

What a shock to be doing two blog postings in a row...but I just had to brag! I had done a Christmas ornament (off-loom beading) for my friend Sharry. She called a few weeks ago and asked if she could enter it in the fair and I told her sure. Sharry's daughter won a Best of Show ribbon for one of her cross stitch projects, Sharry won, I think, three blue ribbons for quilts and I won a huge purple Judge's Choice ribbon for my beading efforts. My first ribbon ever! I didn't even have a photo of the project so I prevailed on my friend, Jennifer, to take a picture while she was at the fair today and here it is:

Friday, September 16, 2011

Another Box Project

I have niece that is always so upbeat and she and my nephew have had a rough year. Thought it would be fun to make something special for her. She is a costumer and does a lot at Halloween. Her business name is "Bloody Beautiful" and she loves steampunk and dark things. This is another box made from mat board and covered with paper, distressed and, because of her sewing, I added a pin cushion to the top. Here is a picture of the front with her name on it and the name of her business.

Of course the box has a lot of "Tim" stuff as well as various ephemera to do with sewing, some stamping and even some buttons. Managed to work in some grunge board. The top has a great magnifying glass that I grunged up and under the glass is a copy of the Costumer's Guild logo. The little button in the upper right is Melissa's Facebook logo. You'll see steampunk stuff, more "Tim" stuff and odds and ends of stamped things and just whatever seemed to me to be the right things to go on the box. It seemed to me the right sewing box for the person I perceive her to be. Hope she enjoys it!


Wednesday, August 10, 2011

Sort of Late

I have been very bad about posting to this blog. I have another blog that is related to digital cutters and have been spending some time doing some instructional videos for it and just generally going through life dinking around on the computer and making cards and doing some quilting.

Thought I would share this scrapbook page I made a few months ago for the class my sister and I met up for and took in Kansas City from Tim Holtz. Actually we took two classes. People were asked to bring a scrapbook page that was about them and where they were from. Not being a scrapbooker, this was sort of a challenge but I finally got into it. It shows some of my journey from California to Arkansas and a few tidbits about my life in general. I even put in a picture of Roy Orbison because when I first moved here I used to play California Blues and cry a few tears...it was my "go to" song for a year or so.

The "story" pretty much ignores the first 30 years of my life but it does have a Society of Decorative Painters logo and a tiny picture of the first book I published alone. There is a picture of a quilt I designed for an adult home wall, the ATT (All Things Tim) logo, a picture of the door sign I made for the Tim cruise...pictures of a map of where we live, the post office and pictures of my husband with his birds. I did think it was "sort of" me for the last 35 or so years.

Friday, March 4, 2011

Fun with Cards

I saw some cute things to make something spring off of a card and spent some time trying to make it a little easier and this is what I came up with. This is my very first video so it isn't that great but it does show you how to make a spring to put on your cards.

Wednesday, February 16, 2011

Putting A Husband to Work

Yes, I got Jack to make me another thing to use in my crafting endeavors. I know there are new single tape dispensers for tissue tape that were just introduced at the latest Craft and Hobby Association show...but I didn't want a jumble of tape in a box. I did a few sketches of what I had in mind and after a couple of weeks of trial and error, my husband came up with the perfect tape dispenser for my tissue tape. I am going to be adding some Washi tape to it and I have ordered a second one from the woodshop. Usually my husband makes things from oak (free since he can chop down the trees and use his portable sawmill and then stack the wood to dry) but I wanted this one lighter so it was made from store bought pine. I love it! Along the back edge a hacksaw blade is attached so the teeth of it just barely poke up and it makes it easy to tear the tape off.


Something to Post Finally

I saw the greatest box made by a lady named France Papillon (http://papillon-sur-la-branche.blogspot.com/) and she said she would eventually have a tutorial you could purchase...but I just couldn't wait. I grabbed some mat board and started whacking it up and it really wasn't that hard to make a box. My box, at least I think, is a bit bigger than hers,  but I certainly used her box for inspiration.  Mine was put together with tissue tape (Tim Holtz product). I ended up covering it all with various papers and put a coat of Claudine Hellmuth's Multi-Medium Matte Gel over it. I managed to scrounge up plenty of stuff to stamp on it, glue on it and just generally clutter it up big time. The hinges are new ones from Home Depot and I just sanded them and antiqued them with alcohol inks and Copic markers and did the same to some brads to attach them. I really like the way it turned out and I'm anxious to make some more containers. The front of the box is themed as "time for art" and on the top I used a bingo token with my birth year (too small for you to see clearly...ha ha) and my initials. It was fun finding things that I thought would work for the design. I have no plan for what to put in it; I'm just going to sit it where I can see it.
Front of Box

Back
End of Box